
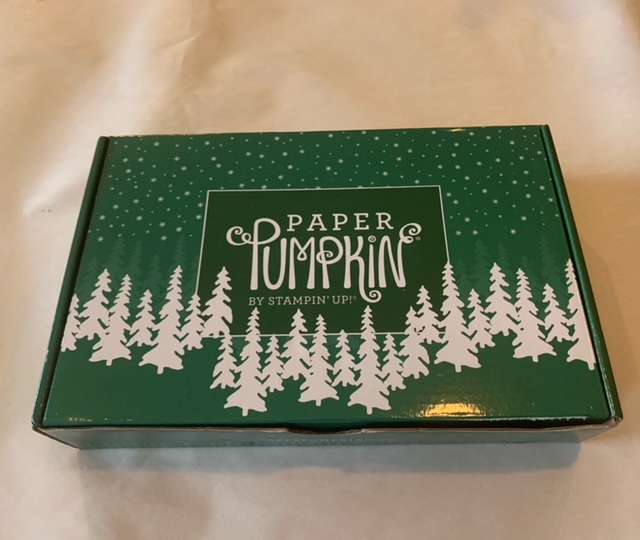
One of my favorites Paper Pumpkin kits is the October Paper Pumpkin! It signals, to me, that the time to begin earnestly Christmas crafting is here!! I do start some crafting before it’s arrival. But the arrival of this kit is when I kick it into gear!!
Christmas Cards
For as long as I can remember, the October Paper Pumpkin kit is all about holiday cards!! And this year does not disappoint. Evergreen trees seem to be very trendy right now. This kit capitalizes on that trend and the winter plaid trend to make lovely cards that are perfect for anyone!
Not just for Christmas
There is a lovely sampling of holiday greetings, in addition to the ones that reference Christmas, that comes with the kit such as: Holiday Cheer, Wishing You and Your Family All the Best, Sending you Peace & Joy All Year Long and To you & Yours. These cards truly can be shared with anyone you choose to send holiday greetings to.
Easy AND Lovely
These cards are easy to assemble and the results are lovely!! Whether these 10 cards are just a few of the dozens you send every year or if they are the only ones you send this year, the recipients will be delighted!!
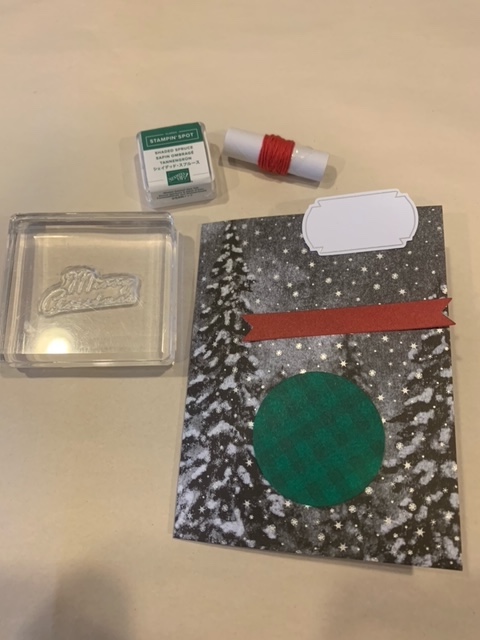
October Paper Pumpkin Kit Card 1: Let’s take a look at the supplies
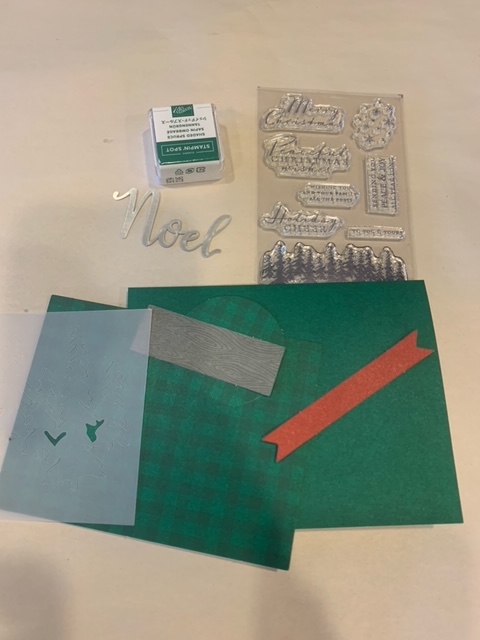
These are the elements of the kit needed to make the first card. I love this rich and cozy color called Shaded Spruce. An ink spot in this color is included in the kit.
The other elements of the kit (the red banner, gray rectangle with woodgrain pattern, “Noel” and a line of evergreens in velum) have all been precut. You just need to pop the elements apart from the larger sheets they come on.
First steps….
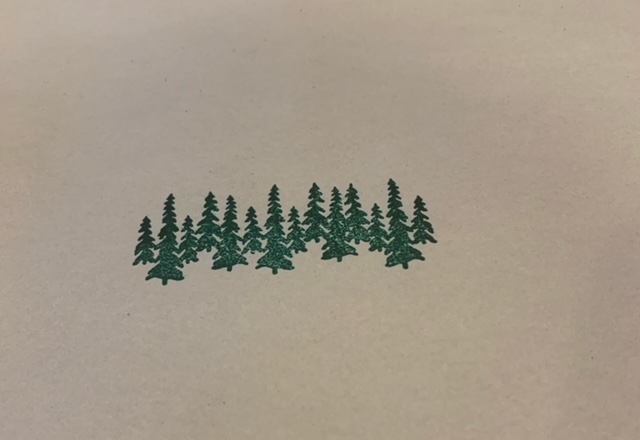
In the first image you see above, I was stamping the first image with the new stamp on some scrap paper. It is important to always give your stamp a “test run” before using it on your good materials! I find this to be especially important to do with the photopolymer (clear) stamps. Sometimes there is a big of residue on them or maybe the stamp picked up some lotion you used on your hands. Both of those things can give you a poorly stamped image.
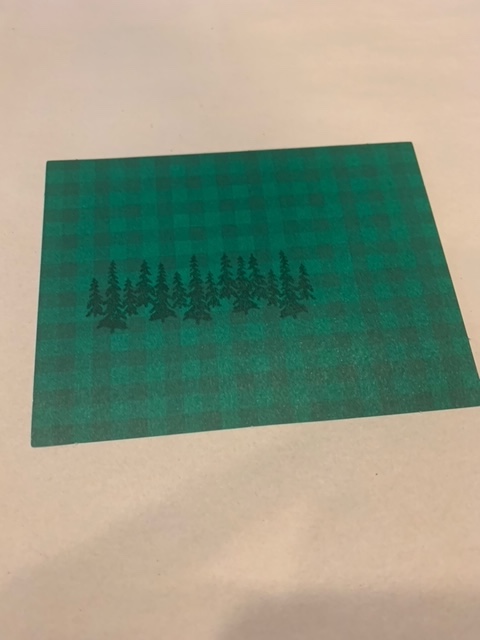
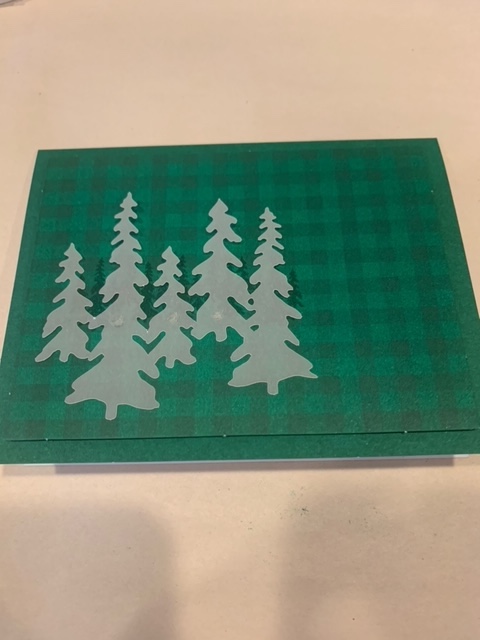
The second photo shows the stamped image on the green plaid paper that is the card front. I’m very happy with the clarity of the stamped image.
And then you will see, in the third image, the addition of the vellum trees. If you look closely, you can spot the 3 glue dots that are holding the vellum to the card front. The trick to adhering vellum is to apply glue dots in areas that you plan to cover with additional layers. You will see in the next set of photos that the glue dots are no longer visible.
Finishing steps…
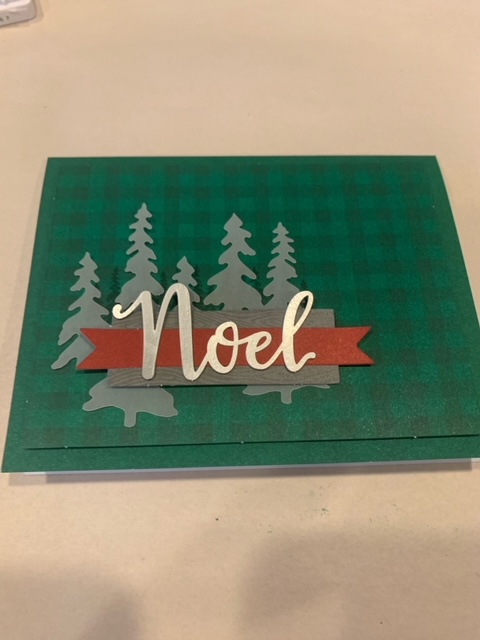
Combining layers into one element 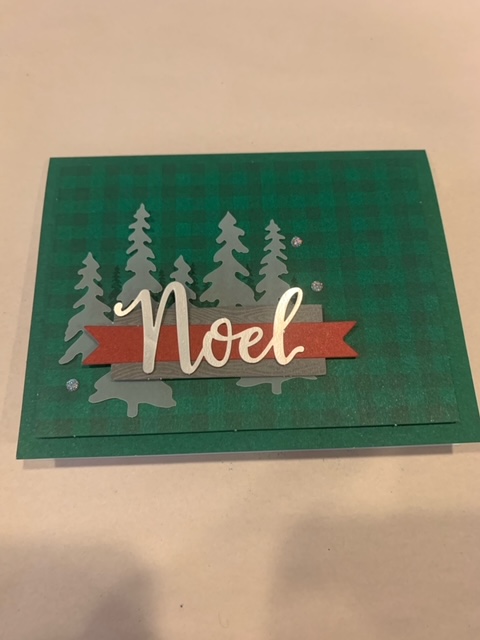
Time for BLING and the card is ready!
The gray rectangle, red banner and silver Noel were used to create a layered element that sits atop the vellum trees. A combination of glue dots and dimensionals are used to assemble the layer.
Finally, it was time to add some bling, which you can see in that last photo.
The end result is a lovely card ready to send!!! As previously mentioned, there is a good selection of sayings in the stamp set included with the kit. Pick your favorite and stamp it on the inside of the card.
You can alter this card for another occasion by omitting the Noel cut-out and adding another element you create with an image or sentiment that reflects the purpose of the card. (Don’t throw away that unused Noel!! I keep a box of the extra bits and pieces from my PP kits. it is fun to get creative with them!)
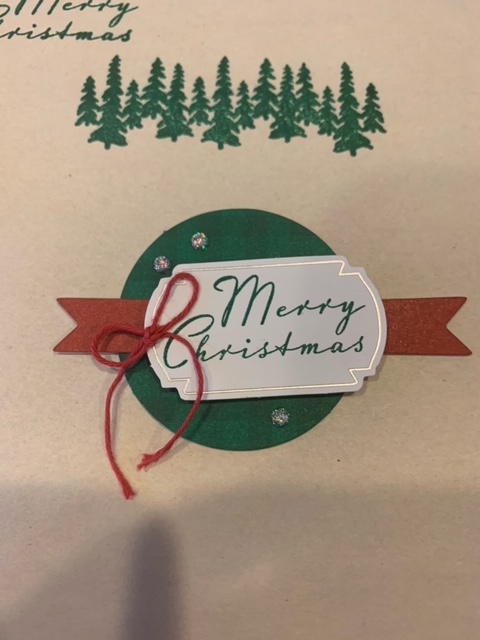
October Paper Pumpkin Kit Card 2: Supplies
Here we have the supplies for the second card that continue the theme of evergreens and plaid. This card has a white die cut piece for the sentiment on the front and will incorporate use of the red twine for a bow. I love the card base that has even carries over the design to the BACK of the card….a lovely touch. It is such a cozy card.
If you’ve seen my previous post about ribbon, you know that bows are NOT my forte. I did manage to make one for the card which you will see in the finished project. But if it really intimidates you, you could instead wrap twine vertically on the red banner in the area the bow would be placed. Tie a knot to secure the twine and decide if you want to cut the ends off or leave a bit hanging down.
Card 2: assembly
In the description for card 1, I gave you tips on practicing your stamping and hiding your glue dots. You can use that same information to determine how the element for the second card was made.
can you find another practice stamp? 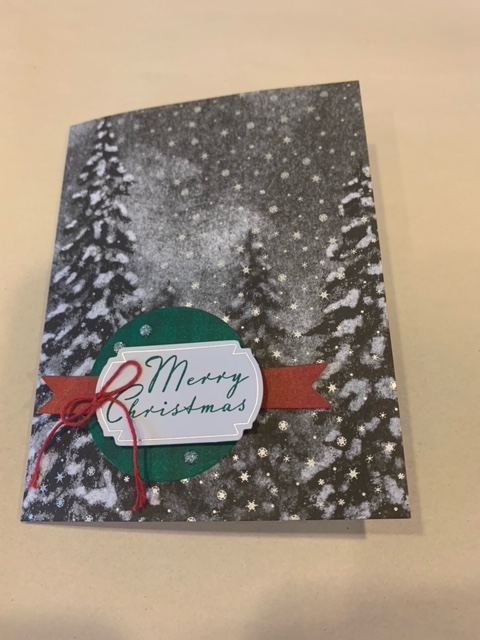
The finished product for card 2.
if you choose, add an additional sentiment on the inside. Then pull up your contacts on your phone, write a message, sign the card, address the envelope, put a stamp on it and GET IT IN THE MAIL.
Final view of the cards and envelopes
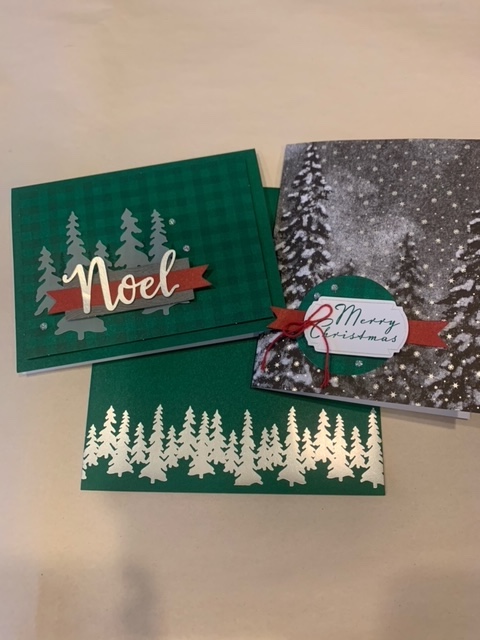
Check out the beautiful envelopes in the kit!! Here are the completed cards and the envelope design that goes with both cards.
I hope you have lots of crafty projects lined up for this holiday season! You can make cards, gift bags, tags and boxes! And you can craft lovely gifts to fit in your beautiful handcrafted packaging!
Click for more information on Paper Pumpkin subscription options.