
But what if I am not good at tying bows?
You WANT to have fun with ribbon but bows aren’t your thing. Well, I’m going to let you in on a little secret…I’m not so great at tying bows myself! Seems they always end up a little lopsided and/or droopy. And I usually choose not to use them.
But I LOVE using ribbon so now what?
I LOVE using ribbon! Ribbon adds color, texture and a lovely bit of embellishment to your cards. Luckily, there are quite a few ways to use ribbon that do NOT include tying a bow. WHEW!! Stick around and see some samples
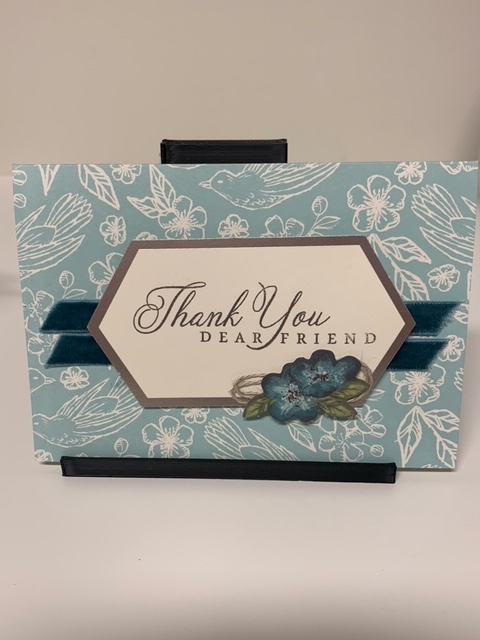
First up is the the straight piece of ribbon
This first Fun With Ribbon suggestion could NOT be easier. Use a straight piece of ribbon. Now, the trick for keeping the ends of the ribbon looking neat is to tuck the ends of the ribbon behind a layer on top of the card before adhering the layer to the card base. Doing this means you don’t have to worry about frayed edges or crooked cuts. The ends are safely tucked away out of sight.
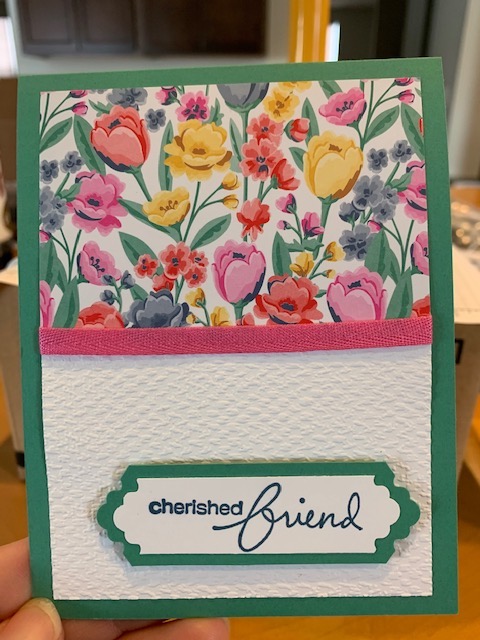
In the Cherished Friend card, the ribbon is a lovely border between two different papers. (It can also be a way to hide uneven cuts of the paper. shhhh…don’t tell.)
Additionally, adhering the ends of the ribbon under the layer means the adhesive is hidden. Liquid glue and ribbon can be a messy situation. A tape runner can stretch out and distort some of the more pliable ribbons. Here comes another secret – I use regular old scotch tape on the backside of the top layer to adhere the ribbon to the card. If using dimensionals to adhere the top layer of your card, I’d leave the ribbon a bit longer so that it is attached to the back (with the scotch tape) more toward the center of the layer so the tape isn’t visible when the card is turned around. (People always flip the card around to see how the layers that are popped up are held in place.)
The second option is the “Z” layout.
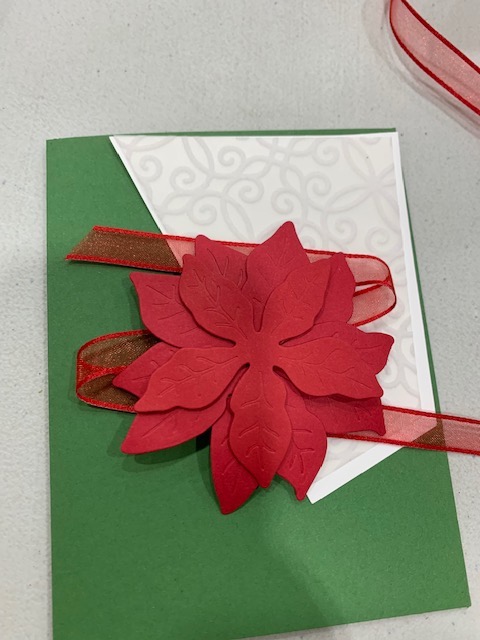
On these cards, you will see that the ribbon is formed somewhat in a “Z” shape. It’s not difficult to do. I usually add a couple of lines of adhesive on the bottom of the element that will be over the ribbon. This way I know that I won’t have extra adhesive poking out behind the element. Next, I gently arrange the ribbon to my liking. Be gentle so the ribbon is only lightly adhered to the element in case you need to make adjustments to the placement of the ribbon. Once you are satisfied, push the ribbon onto the adhesive for a stronger bond.
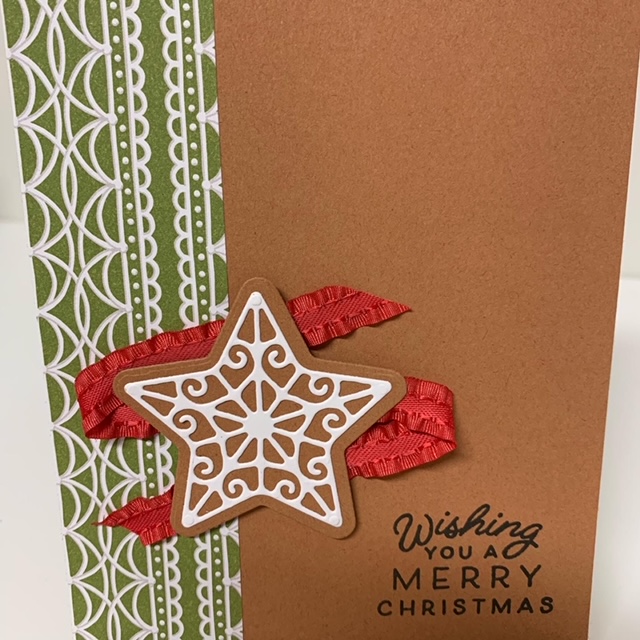
This technique works with a many kinds of ribbon. Note the difference in how the “Z” looks based on the ribbon used. The lighter weight sheer ribbon on the poinsettia card holds its shape and adds significant dimension to the card.
The ribbon on the sugar cookie card is a little heavier and so it lies flatter against the card. They both are good looks. Just be aware that if you are going to a specific look, you will have to use the appropriate ribbon.
The third option is a simpler version of the Z card.
The idea is the same, you add a piece of ribbon behind an element on your card to add color and dimension. However, there is less manipulation of the ribbon needed, as you will see in the sample.
To achieve this look, make a loop and adhere the ribbon to the back of the element being attached to the card. You can also achieve this look with two cut pieces of ribbon that you arrange and tape down.
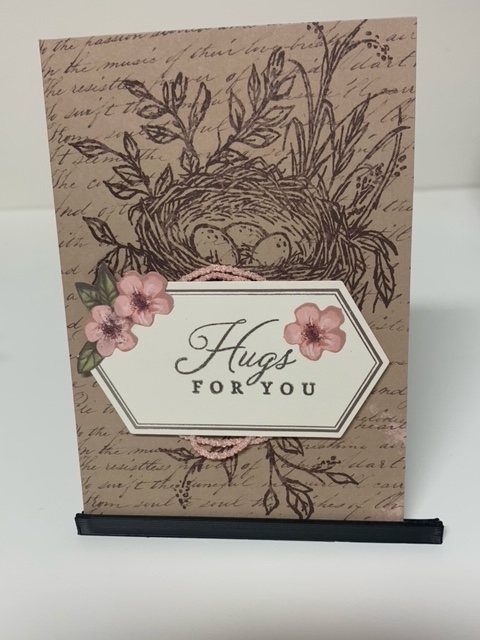
Additional ways to use ribbon on your cards.
The following samples show additional ways to use ribbon or twine on your cards.
Get creative and have fun with ribbon!!! Stampin’ UP! has a great variety of colors, textures and sizes of ribbon available. PS…The Clearance Rack has just been updated and there is a good selection of ribbon there. (Clearance Rack items are while supplies last and tend to go quickly.)
A couple additional tips for using ribbon.
Finally, when adding elements over ribbon, you will want to use dimensionals to secure the element to the card base. You don’t want to squash the ribbon you so carefully placed!!
And, you will want to snip the ends of the ribbons on angles. This helps prevent fraying and gives a nice finished look to the ends of the ribbon.
Have FUN incorporating ribbon into your card making! I’d love to see how you use ribbon on your cards! You can share your creations in the comments or by emailing me at elisa@creatingwithelisa.com.
HAPPY CRAFTING!!!!
Elisa O’Neill