
What are they?
Floating frames and floating elements are features you can add to your cards. Using window sheets, you give your projects the illusion that part of the design is floating above the card. The process is simple once you know what to do.
They have been around awhile but this is a new twist
The concept of the floating frame has been around a while but was a little more tricky to manage because instead of using the window sheets, images were assembled and transferred to the card using press & seal wrap. It was a novel use for a kitchen product but there were limits. First, we all know how sticky that stuff is and it doesn’t take much for it to get stuck on itself! Second, sometimes the press & seal pulls ink off the stamped images and/or tore the cardstock.
New and improved
Using the window sheets for floating frames and floating elements is much easier! You can spend more time focusing on your design instead of having to manage the plastic wrap. When you make a frame, you can use the center piece cut out of the frame as an element for another project. Or you can make elements on their own.
Let’s get started!
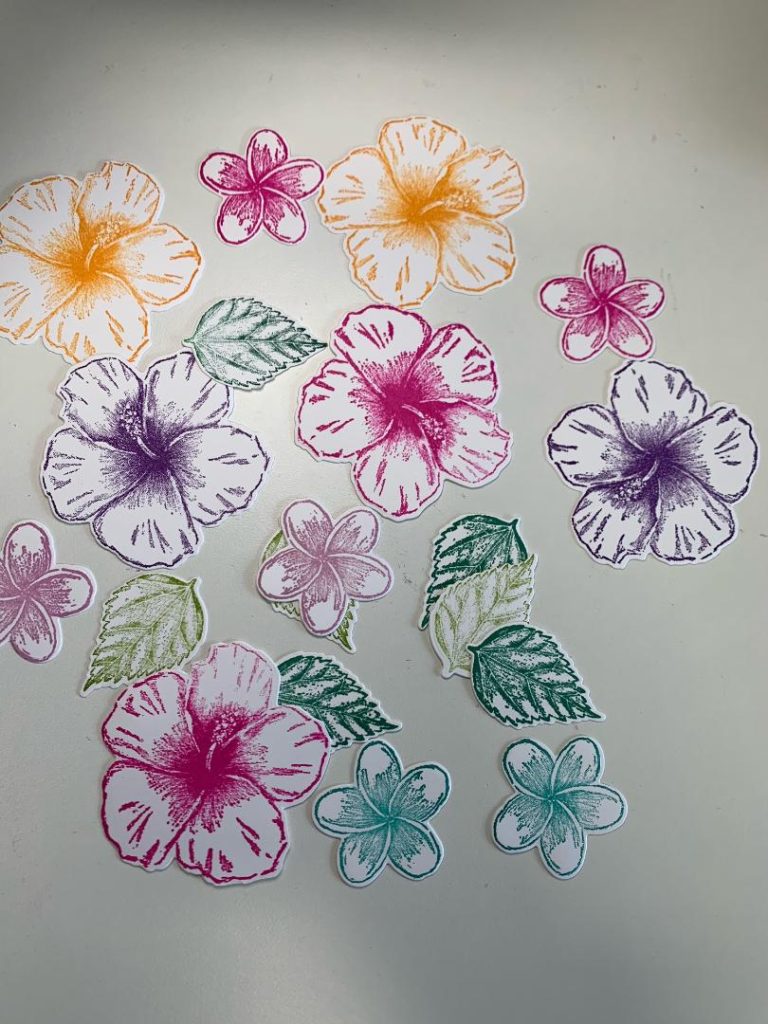
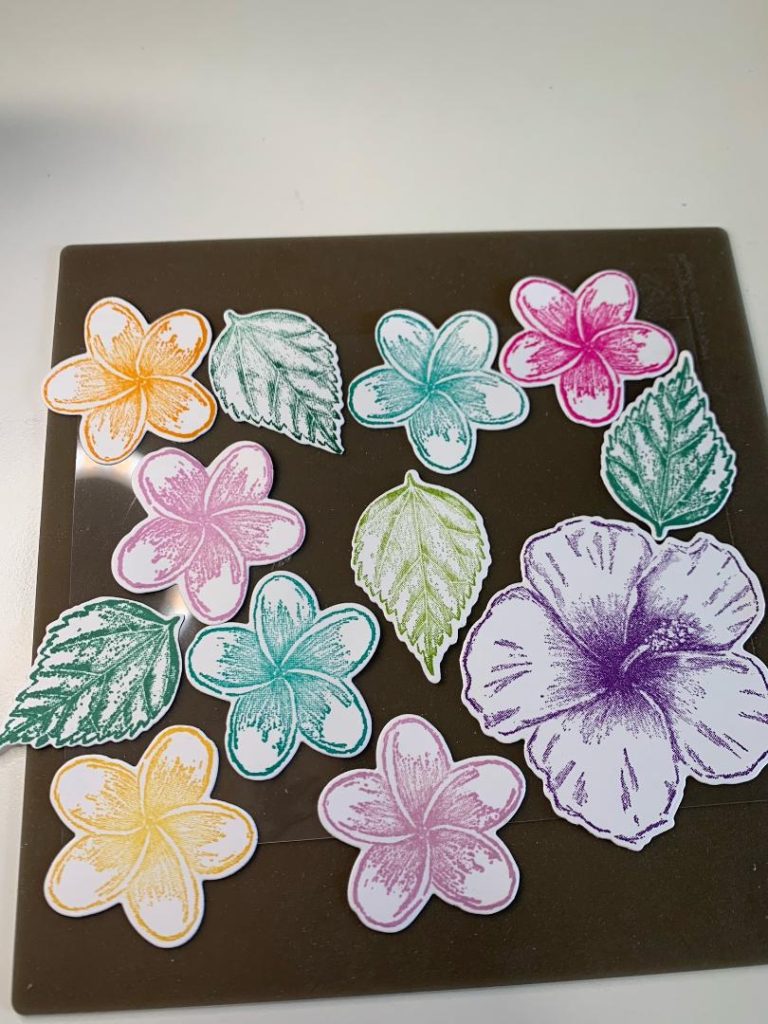
My sample is made with images from the Timeless Tropics stamp set and coordinating In the Tropics dies. I chose vibrant colors to stamp the large and small flowers and leaves and then I used the Cut & Emboss Machine to die cut the images.
Lesson learned: I so liked the large flowers that I did not pay attention that there was NO WAY all of the large flowers would fit on the project even before adding small flowers and leaves. So you may notice in later photos that I used more smaller flowers and a single large one.
Time to arrange the images
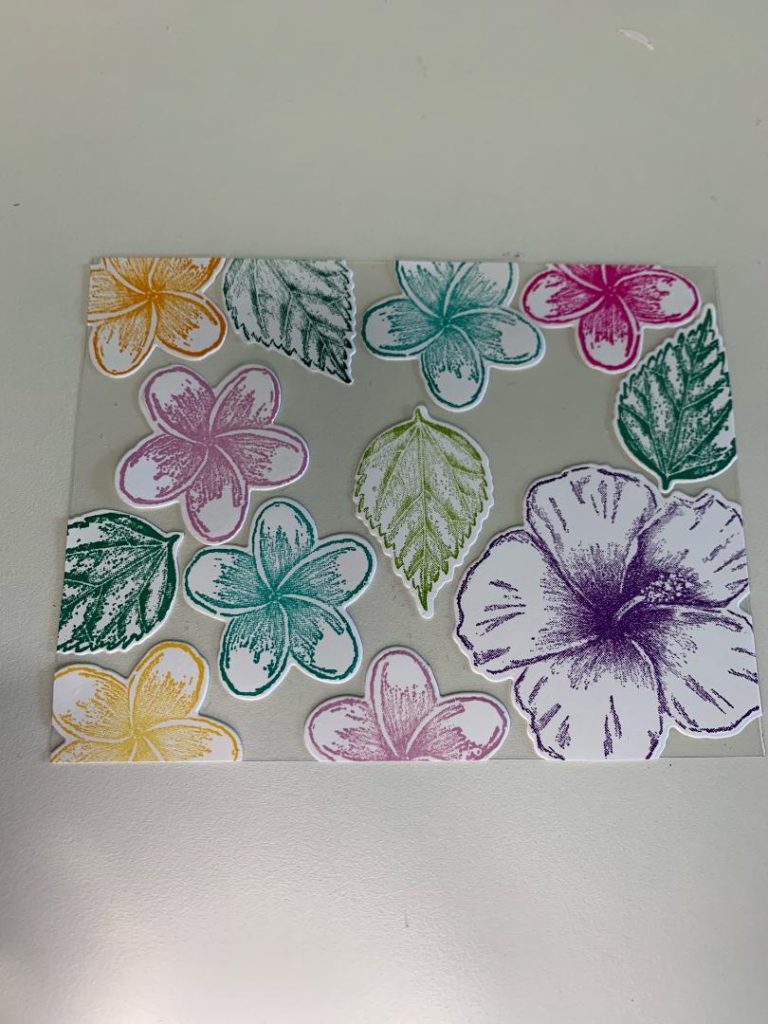
I cut the window sheet to 4×5.25. Next came the fun of puzzling the images together on the sheet. They shouldn’t be touching but there shouldn’t be large gaps between the images. When you like the layout, adhere the pieces to the window sheet.
Some gaps may be larger than you’d like them to be and that is okay. I’ll show you how that can be fixed later. It is totally okay to have the images hanging over the edges of the window sheet. I have the window sheet on the silicone mat so that the adhesive on the pieces hanging over the edge don’t stick to the table.
Clean up the edges
Cut along the edge of the window sheet to trim off the stamped images hanging over the edges. Be careful with the pieces you trim off as they can be used to fill in gaps later.
Time to cut out the center to make the frame
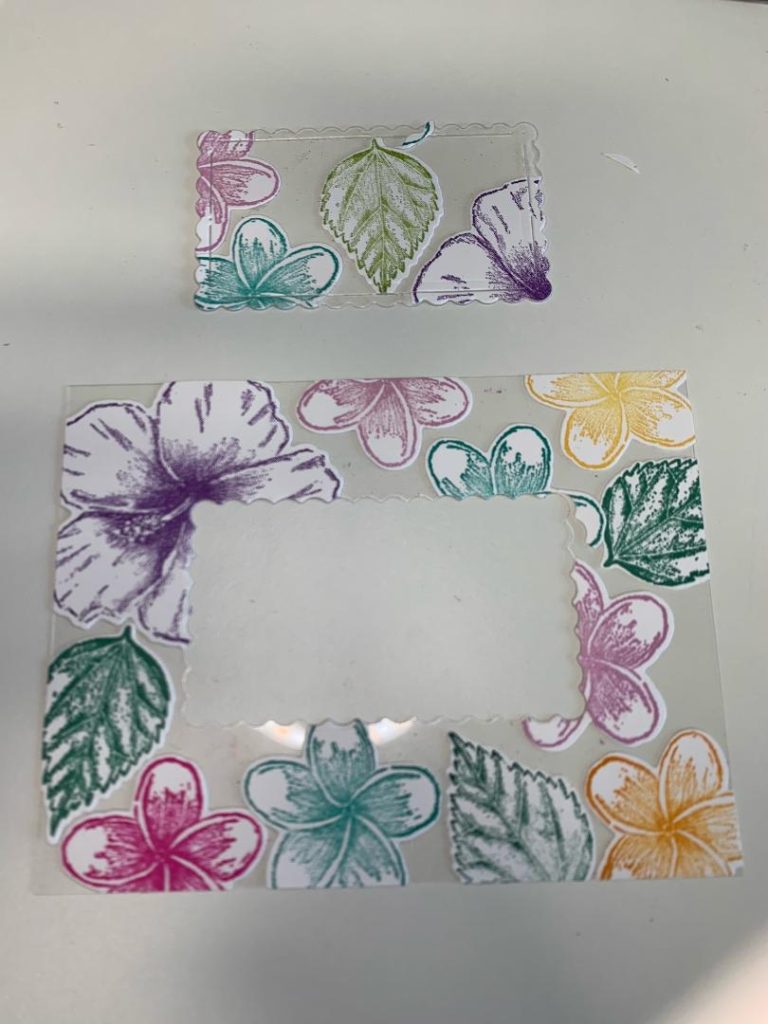
Using a die from the Scalloped Contours Dies, I cut out the center of the window sheet. Run it through your die cut machine a couple of times so it cuts completely.
Lesson learned: Stick to shapes with straight edges for the frame. The scalloped edges made it difficult to fit the extra pieces into gaps on the piece from the center. You will understand that better when you try this technique. Stick to straight edges, at least when first trying this technique.
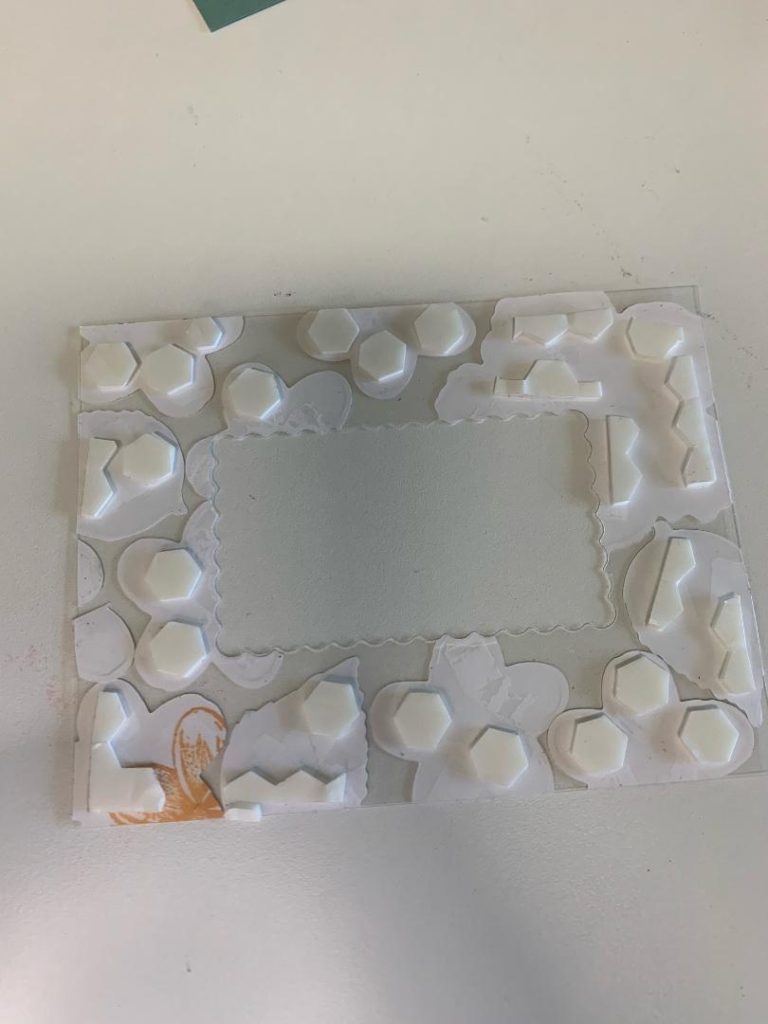
Add dimensionals to the back of the window sheet. Be sure you place them behind the stamped images so they don’t show through the front of the card. You want to use plenty to keep the window sheet flat and even.
Finished Floating Frame Card
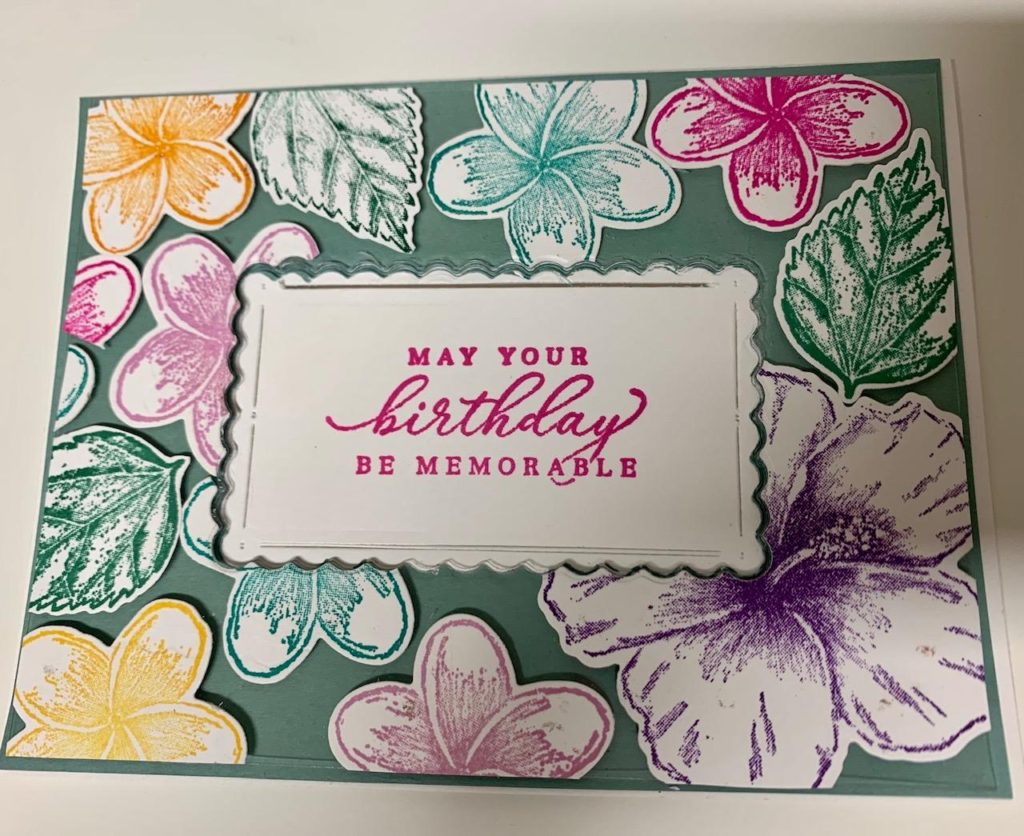
I mounted the window sheet to a piece of Just Jade cardstock. Next I lined the die up with the previous cut so that it cut through the just jade. It is easier to cut one layer at a time. After adhering the Just Jade piece to the Basic White card base, I tried to use the die to cut through the top of the card base to make it a true frame. It was just too many layers. So instead of stamping the image on the inside of the card so it could be seen from the front, I stamped it on the front.
Floating element
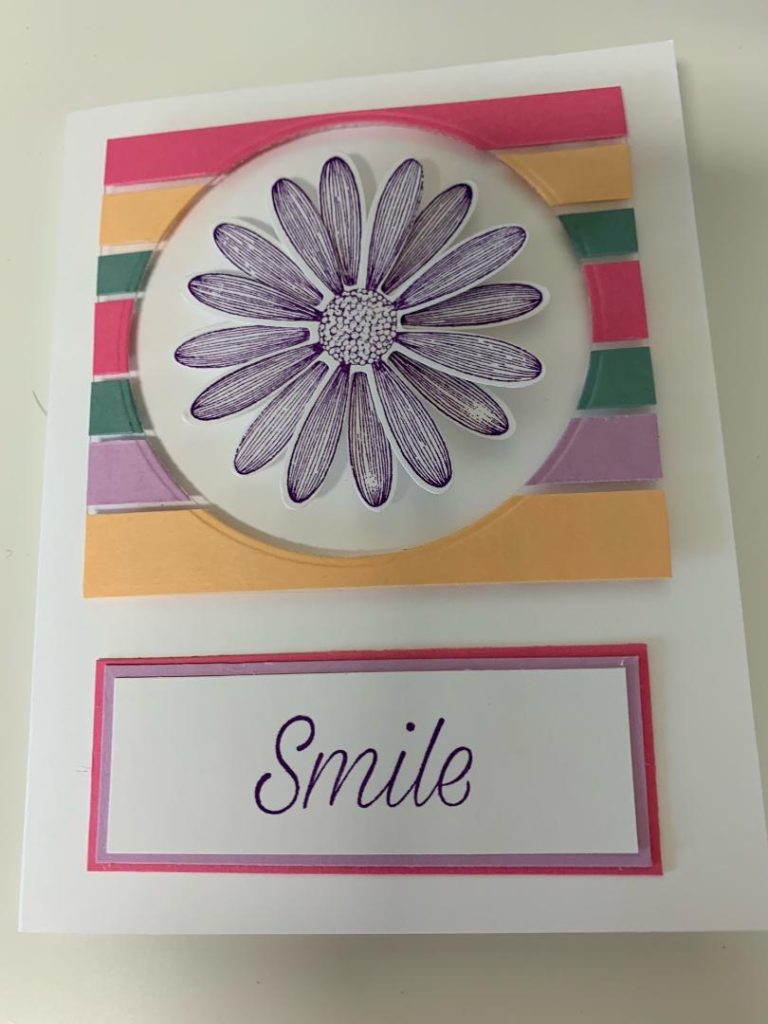
Here is a quick project where the intent was to use the circular floating element but I liked the way the card worked out using the negative left behind when I cut out the circle. I have saved the circle to use on another project!
Choose your color scheme
I chose to use 4 of the new 2021-2023 In Colors for this card. I cut strips of cardstock in widths of 3/8″, 1/2″, 5/8″. The layering circle die I planned to use is 3″ in diameter so I cut the window sheet to 3.5 x 3.5. After planning the order I wanted to the colored strips to be arranged, I used tear and tape to adhere them across the window sheet.
I used my cut & emboss machine to die cut the circle from the center of the square.
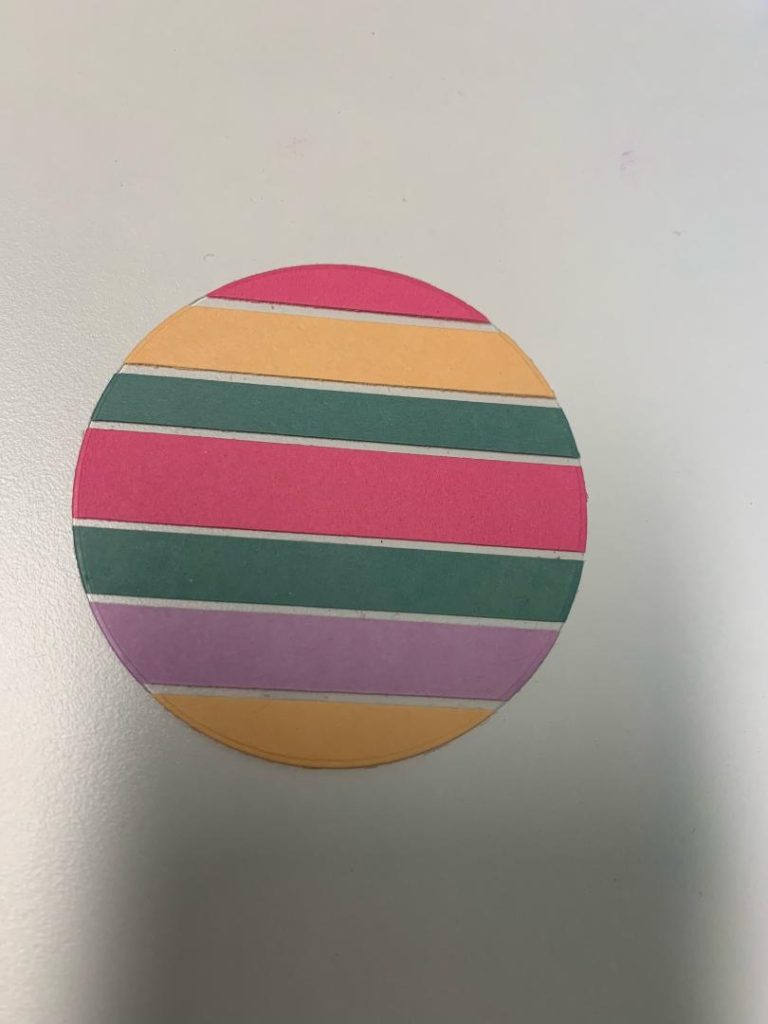
This is what the intended element looks like. I was planning to add a punched daisy to the center of it but the daisy took up too much room and the floating stripes didn’t have much of an impact.
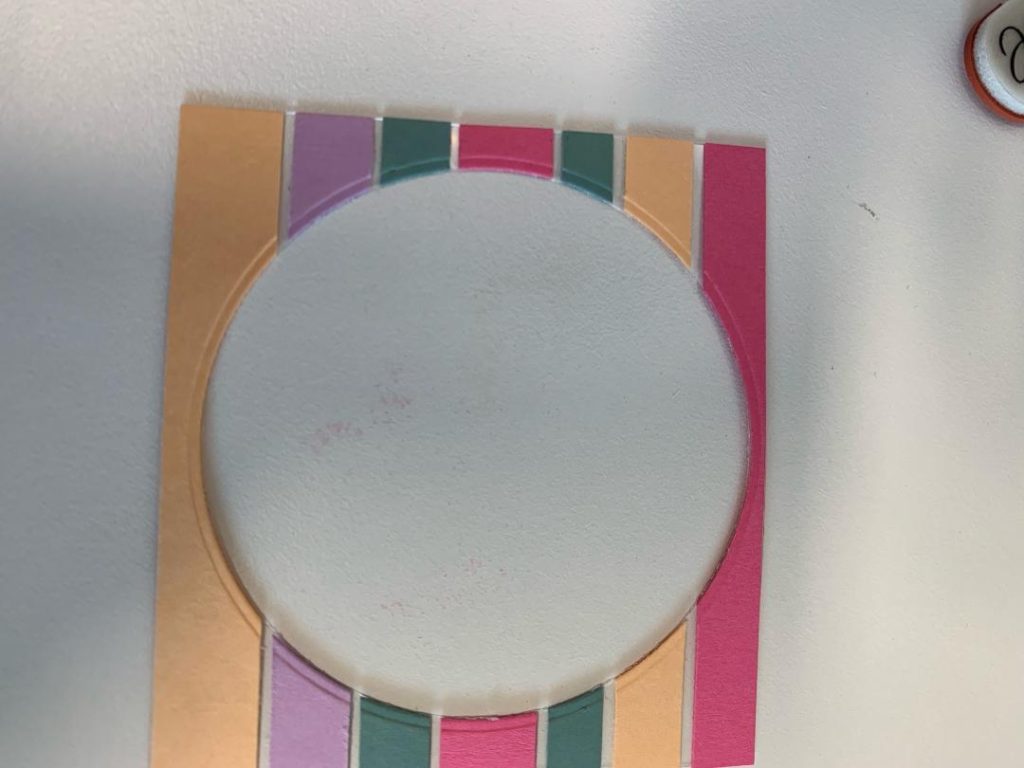
This is the what I ended up using!!!
The window sheet is mounted on the card base with dimensioanls. I centered a daisy in the middle with two dimensionals, one on top of the other, so it is slightly higher that this unintentional frame. I stamped a sentiment on Basic White and then layered it with colors I used on the floating element. (Fresh Freesia and Polished Pink)
The directions are much shorter for this card because once you get the idea of how to do it, it’s pretty simple. The technique has been demystified so now you can look at samples and figure out pretty quickly how the cards were made.
A complete supply list can be found here. You can purchase any/all of these items at my online store. When you try this technique, please submit photos via the comments section!
HAPPY CRAFTING!
i like the cards! thank you!
YOU’RE VERY welcome.
I love these stamp sets and am excited they carried over into the new catalog!