
What? Halloween Ornaments?
Today I am going to show you some fun Halloween ornaments made with vinyl and acrylic blanks. While I usually do paper crafting, I thought it would be fun to show you other crafts I enjoy.
My trees…
A number of years ago I bought two cute little white trees. Of course, I looked at the box (which had an up close photo of the tree) and didn’t pay attention to the actual measurements. Therefore, when I finally opened them (years later…shhh) after finding the perfect spot for them, SURPRISE, they are not nearly as tall as I thought they’d be. But they are still really cute.
Those two trees finally made an appearance at Christmas where they resided on the mantel. They had cute mini ornaments on them and I smiled every time I saw them. So when Christmas was over, I didn’t want to take them down!! My brilliant idea was to put decorate them for each holiday or season. The problem was, however, that the trees are small and it isn’t easy to find ornaments to fit.
My big idea…
My big idea came to me as I thought…hey, you’re kind of crafty, why not make some Halloween ornaments? Using some 1 inch acrylic blanks (with holes for hanging) amazon and a stack of vinyl (both purchased on amazon) and my Cricut Explore, I got busy.
Keep it simple
My plan was to use very simple designs from Cricut Design Space because the images were going to be quite small. When I typed “Halloween” into the search bar, there were SOOO MANY images to choose from. So, I narrowed down my searches to “spider,” “witch hat,” “ghost,” etc. I inserted the images I liked onto the canvas and started sizing them. To “test” if they would fit well on the acrylic blanks, I created a 1 in circle in Design Space and then I layered the images on top of the circle to see how well they fit.
Time to cut
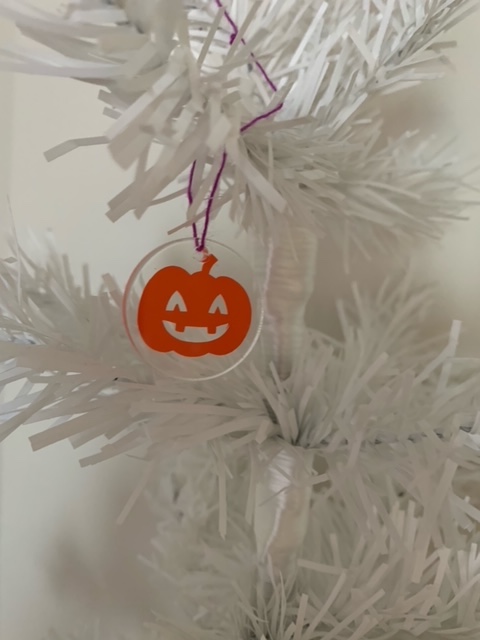
Now it was time to cut the images! All but one were single color images so I did keep it simple. I was quite excited after cutting the pumpkin because at less than 1 inch, it cut out of the vinyl PERFECTLY! Woohooo!!
I weeded out the excess vinyl so all that remained on the backing sheet was the vinyl cut being used. Using a small piece of Cricut brand transfer tape, I picked the images up from the backing sheet and then placed the image on the acrylic blank. I burnished the image and then removed the transfer tape. SUCCESS!!!!
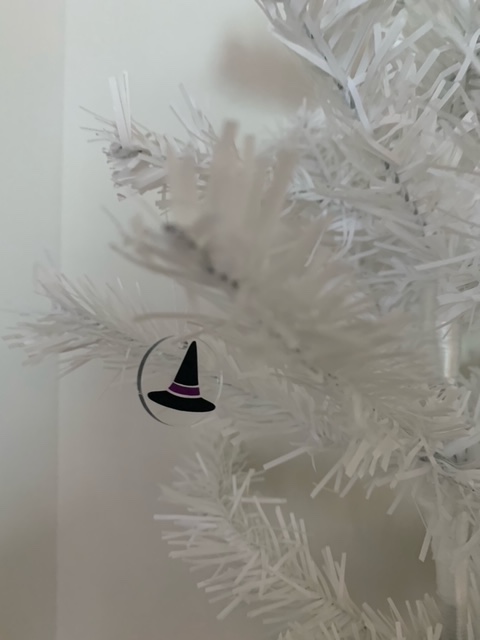
One of the images, the witches hat, used two colors. That was pretty easy to navigate because of the way the image was designed and the colors fit together.
After weeding the cuts, I picked up the purple band for the hat with the transfer tape first. Then, with the band still on the transfer tape, I moved the transfer tape over to the rest of the hat and lined up the band where it belonged and pressed the transfer tape down to pick up the hat. Now I had the complete image, with both colors, on the transfer tape. Following the same process as described above, I transferred the vinyl to the acrylic blank.
Simple but awesome
Seriously, this is a super simple project but it was so awesome and I am so excited with how well it turned out. I made 2 of each design (a set for each tree) but realized after putting them on the tree, that I need to make more because even though the trees are small, they are too sparsely decorated at the moment. Since Halloween is quickly approaching, I will show you what I have done so far and hope that I can make some time to create more!! As you can tell, I have a problem with guestimating sizes and necessary quantities, It will come as no surprise that I also cook waaaaay too much food when we have gatherings!
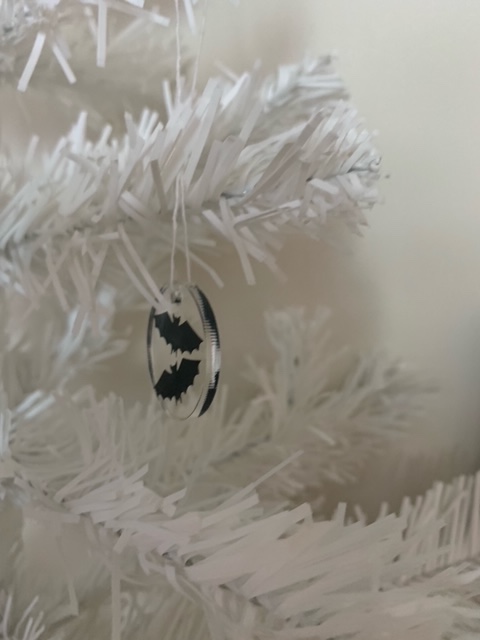
bats 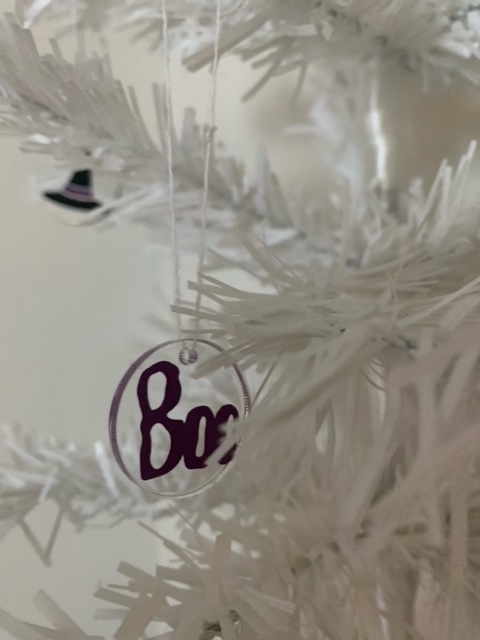
BOO! 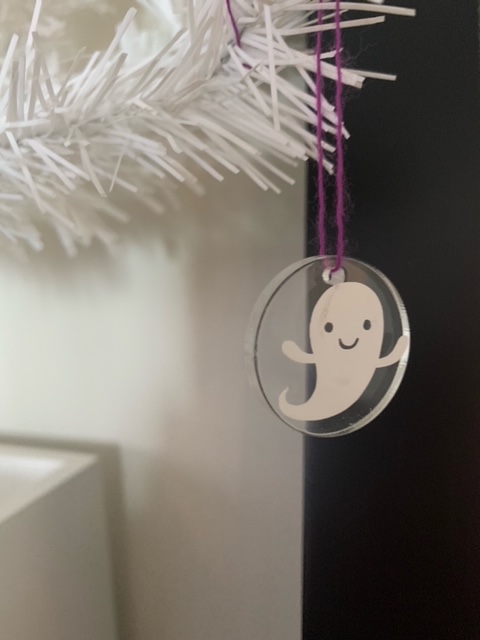
a friendly ghost 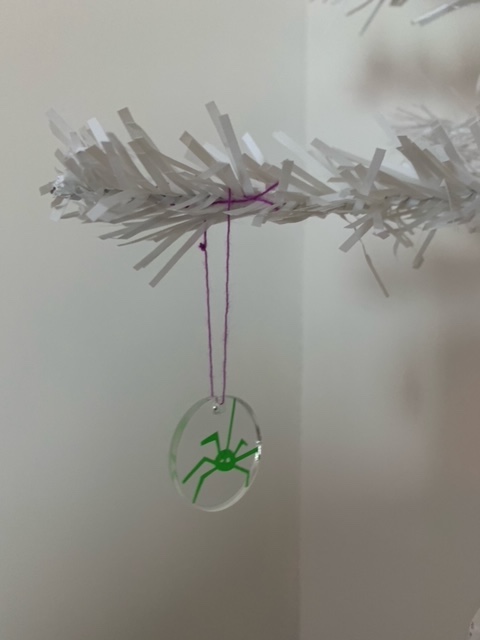
eww…it’s a spider but it is brightly colored 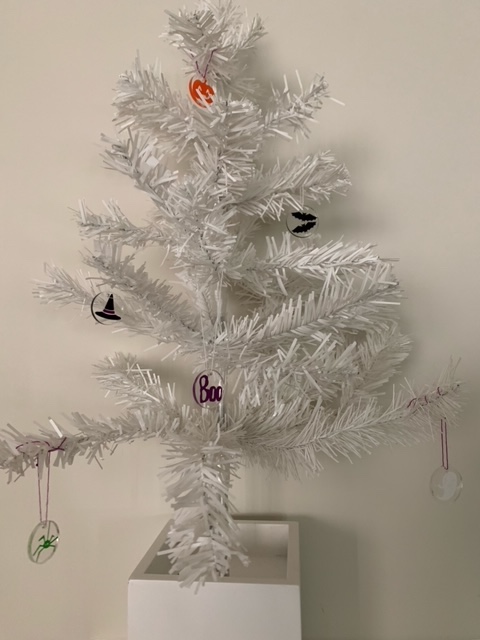
my tiny tree with not quite enough ornaments
HAPPY CRAFTING!!!
Please share in the comments crafts you like to do besides paper crafting!!